Welcome back

We’re excited to see you!

New to five six seven eight? No worries, welcome to this full on artistic dance blog.

Scroll down to have a look at any of my recent posts.

Want to know more about this blog? Check out my about page for more information.

Please comment and like my posts.

And if you’re feeling ambitious, why don’t you hit that follow button!

Go on, what are you waiting for?

Making the improvements to go for gold coming soon…

Not that long ago, I was competing in dance competitions and placing a lot in my categories. I was going along improving class after class and practicing before competitions. I would normally place in nearly all my solos and even go and come out with Gold a couple of times, maybe if I was lucky I would get a few trophies too. But about six months ago, I put my foot down and said this wasn’t enough!  I then made significant changes which secured my goals for a dance comp. After making these changes, I came out with a total of 9 trophies! I’m going to tell you what changes I made to go for Gold in all my solos and what really made the difference.

How much should you really be dancing?

People often ask me how much I dance. I take a heavy breathe and try to explain…

Dancers that take ballet classes, should ensure at least two hours of ballet a week. Whether that be a graded class, a general ballet class or a P.B.T/ ballet conditioning class it’s up to you how your school allocates this time.

But let’s be clear… How much should you really be dancing in general?

Here’s my view:

(As I have already said…) Dancers that take ballet classes, should ensure at least two hours of ballet a week. Whether that be a graded class, a general ballet class or a PBT/ ballet conditioning class it’s up to you how your school allocates this time. Students over the age of 13 should probably be aiming on at least 3-4 hours of ballet per week.

Dancers that participate in Jazz/Modern classes, should take part in at least one hour and thirty minutes of class. I would recommend, an hour of modern/ jazz class and modern incorporated in comp work for dancers age 10 and under. And then once  students turn 11 they can start intermediate foundation ISTD modern which I really do recommend because it involves different styles in the grade, which is very beneficial for a young dancer.               As a side note dancers (aged 10) can also start ISTD jazz grades their very short grades that really prepare students for the modern grades.                                              For older students, I would hope that stretching and conditioning would be in a separate class as really modern classes should be about strengthening turns and pure technique.

Stretching and conditioning for children over 10 should be a familiar subject. For older students this really should be a separate class besides modern.  Flexibility and strength is really key to improving technique and enabling repertoire.

What do you think?

Comment down below with your opinion…

Fh XXX

How to relax yourself in dance exams…

Dance exams can be stressfull, when you are worried, not prepared or (like me) bad at picking up choreography. The good news is, everything in life has a way round it. In this blog post, I will share some of my top tips to relax yourself in exams and before.

Be prepared!

Don’t go into an exam, without being prepared! Even if other people around you aren’t make sure you are! If that means spending hours at home, then do it. Make sure you are prepared at least three days before hand. Days before I go into an exam, I do a mastermind on my teacher.  “Will we loose marks if, we mix up the numbers?” “Can we say yes if they ask us if we’d like to get a sip of water.” “Is that exercice we just did first?” “Will the examiner be ok if we do the reveraunce like chimps, seeing as its not officily marked.” Miss Alex’s nightmare goes on… Practice all the exercices especially the ones you’re not so confident on. Research or ask your teacher about the examiner you’re having. Ask questions like, “Is she or he a harsh marker?”

Dance beforehand:

Make sure your nice and warm before you are about to enter an exam not just so your not so stiff but when you’re cold, I’ve noiced dancers tend to dance hesitently.

Focus:

Keep nice and calm before you enter and make sure you’re not unsure of anything before you go in. If you have a quenstion un-answered, you will be wondering this througout all the excercices and distract yourself. Keep nice and focused and go over everything you have been taught.

I hope these three top tips were beneficial to you,

Thanks again,

FH xxx

How to improve your improvisation skills…

Improvisation is something you cannot be taught. If improvisation is scary or unnatural to you, there are easy ways round it however. And there is certainly ways to improve your improvisation skills. This short blog post will hopefully change your mindset when you are improvising.

1. You won’t be good at it if you don’t enjoy it. I love improvisation and anything that involves choreography. But if you don’t have the passion for it, you simply won’t be good at it. When you get to a certain stage where you can do an Impro to music you’ve never listened to (Not even once!) and you feel comfortable, you will start to enjoy it. And that’s when you’ll see the improvement in the Impro itself. If you’re forever worried or not comfortable throughout your improvisation, it will show out to the audience.

2. Change your mind set! When you’re performing an Impro, if you are thinking about the steps all the time, it won’t look too great. Focus on the beat/the words or the type of music not what move you’re about to do next.

3. Don’t be afraid about looking awful. I often do moves in Impros that have never been done before. If it feels right, go for it. When I make up a dance, I’m not thinking about all the moves I should be including its whatever looks and feels right. There is no success criteria as such in an improvisation or dance.

4. If you still feel uncomfortable when performing Impros, introduce them gradually. Start playing 10 seconds of a random song or tune. Think about what kind of music it is and what style you imagine a dancer would perform it in. Before you think of any moves, just stand where you think it would start. Restart the music and instead of thinking of what moves you’re going to do think of what direction you want to travel in. Then restart it again, go in the exact same direction but instead of walking, glide/skip/ turn to your position. Then, keep thinking about direction and let your body think about the moves. This will allow you to relax and start to enjoy Impro more.

I hope these mini tips were helpful!

Please comment! And feel free to ask any questions.

FH xxx

Pointe shoe tips for beginners: Part 2

Hi there,

A few days ago, I wrote “Pointe shoe tips for beginners: Part 1”. I hope you found that helpful. Because I couldn’t fit all the tips in one blog post I have made a part 2. Part 2 is more useful for people who are en pointe but are not too experienced. Though, you may find this helpful if you are about to go en pointe too. I hope you enjoy!

Watch out:

It is important to watch out when you have only been en pointe for months. I know you want to try new stuff and start doing stuff like variations en pointe but just stick with simple exercises for the first six months. You want to make sure you have the best start to pointe as possible and jumping too far ahead at the early stages is not such a good idea. Pointe work can be really fun, but also quite dangerous when in the wrong hands. Take care of your feet. Especially at the beginning. Even I, who have only been en pointe for nearly two years, wants to do complicated stuff like professional ballerinas would. But I have to remind myself that I only have one pair of feet in my life time, and that I need to take one step at a time.


Strengthen:

Before you go en pointe, dancers should strengthen their feet. However, if you haven’t, it’s important you strengthen your feet even if you’re already en pointe. There is a variety of strengthening exercises you can do. Some require gear, although some of the best strengthening exercises tend to cost the least. For example, simple exercises like naughty toes, good toes can actually be very beneficial. Another beneficial exercises can be used with a Thera. Rap the Thera band around the mind part of your foot (the arch). Then slowly pointe. You should push through the residence. You can also perform this exercise without a Thera band and just slowly pointe your feet. There are many other useful exercises! I might wright a blog post about strengthening exercices in more detail.

Experiment:

Like I said in part 1, “Many young dancers don’t find their perfect shoe until around the 4TH pair.” Experiment! Commonly, your first pair will not work for your feet. I have had three pairs so far and all of them have been different makes! This has been very helpful to me, as I now know exactly what I want and don’t want from my pointe shoes. I have also experimented with varies different padding and protection. It’s good to experiment and don’t be afraid to, in case it’s “worse.” When you are fitted your never 100 percent sure that you’re going to definitely love your shoes and the padding given, the better and more experienced the fitter though, the more likely the shoe will be right for you.

I hope you found part 2 of this blog post helpful!

Thanks

FH xxxxx

Pointe shoe tips for beginners: Part 1

Hi there,

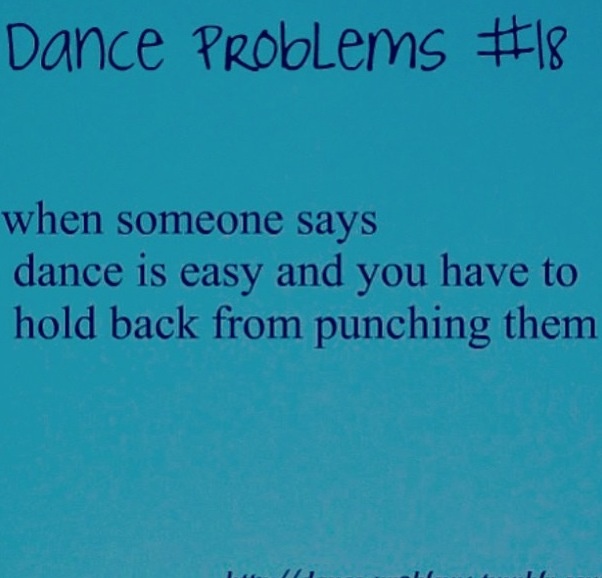
Sorry I haven’t written for a while!!! This blog post was made for my friend, who is starting pointe work in September. This should be helpful for young dances who are going en pointe or have just started as well. There is a part 2 to this blog post, coming soon. I hope you enjoy.

Be prepared:

When you start pointe it is essential to be prepared. (Which I was not.) Talk to friends who are en pointe currently and ask them about the feeling of pointe. Many teachers tell students they are ready for pointe without discussing what your feet need to do, to even just get on the Bloch. Really understand how your feet are going to move when you are in pointe shoes. For example, many students don’t realise when you are rising you need to roll through your feet just like on demi pointe. Don’t just snatch up there. Pointe your feet in the pointe shoes when you are fully up right on the shoe.

Be prepared for pain, be prepared for discomfort, and be prepared for trial and error. Many young dancer’s, don’t find their perfect shoe until around the fourth pair. Be prepared for the fitting. Choose wisely! Does any of your friends’ recommend a pointe shoe fitting shop? Research where the best place is to go is. Often the best option is not down the road from you. Choose somewhere, where they are going to take time with you and look at your feet properly. A pointe shoe fitting should never be an in, out shop. Take your time with the fitter. Who should be a professional fitter.

Save your feet!:

You may think you’re ready, your teacher may think you’re ready but are your feet ready? Save your feet! If your feet are not ready for pointe, you may damage your feet in the long term. It’s ok to wait. Really think about if your feet are actually that strong. If your feet are strong enough when you go on en pointe you should be capable of walking round the room, with ease. If you are not, you will find it hard even to get on the bloch. You should always do slow rises in your first class. Make sure you’re not doing too much when your feet are just getting used to pointe.

Listen to yourself:

Your teacher or friend may have a completely different experience of pointe. If they don’t recommend a brand, don’t right the company off. Ever foot is different and different pointe shoes work for different feet. Ask your friends what padding and shoes they recommend but not what they don’t recommend. Listen to yourself if the padding you’ve tried doesn’t work for your friend but it does for you, use it. Pointe shoes and padding its totally personal to your unique feet.

Tell someone:

If your experiencing pain of any sort even on your first few weeks. Tell someone who knows about pointe. It might something easily explained such as: too long toenails, in growing toenail, not used to the feeling yet, too little padding, too much padding, the wrong shoe etc. Or it could be something more serious, so make sure you let someone know.

I hope you enjoyed part 1 of this blog post and I hope you will read part 2 which is coming soon.

Thankyou,

FH xxx

Ask to get an Answer

Hey guys every month I’m going to write a post titled Ask to get an answer. Molly or someone else who would like to ask a question will get an opportunity to ask any dance related questions. Even if you’re not a dancer. I would be interested to hear from you no matter how small/big or silly/clever your question is. You will get a direct reply/a blog post covering your question.

To ask a question comment on this blog post.

Step 1: Click on to the title of this post.

Step 2: Scroll down until you find the comment button. Click on the button and it will take you to the commenting section.

Step 3: If you don’t have a WordPress account just take five minutes to register.

Step 4: Comment your question and post.

Thanks,

FH XX

My Russian Pointe Review

My Russian Pointe Rubin Review:

First of all let me just give you some information: I have Russian pointe, (Rubin, V cut I think) I have been dancing en pointe for about a year. My Russian pointes are my second pair, I’m going on to my third pair of pointe shoes. And for a quick sum up, I have mixed emotions about Rubin Russian pointes.

All Russian pointes are pre- arched in some way. Others have bigger arches then others. Personally, I think having a pre-arch is beneficial to a dancer, however because of the pre-arch this means the shank and the shoes are incredibly hard. I have worn my Russian shoes for nearly six months, doing regular pointe classes and they are still not broken in. In fact, I tried so hard to break them in the next day in a pointe class, the back of the pointe shoe snapped. The back of my pointe shoe looks like someone has slit the shoe with a knife. The crack, thankfully, for now hasn’t affected the way I move and dance en pointe, but it still shouldn’t happen!

Another downer is, the shoes are extremely loud -though not making a sound when performing a pirouette on them. I have to say, the shoes give you incredible balance, which is always helpful when working in the centre. Though as my teacher  explained to me today, the pointe shoe is doing all the work for me without letting me work through the feet.

What I was very happy about when I first got them though, was they were so much less painful than my super soft Freeds. I suppose having very hard shoes does come with some advantages.

Do let me know if you would like me to a review on my Freeds, I did not have a very good experience at all. Also I’m so sorry I haven’t posted for ages. Please feel free to comment below. Shout out to Molly who commented asking for a dance injury post. I shall be posting regular dance warnings and tips covering injuries.

Thanks again,

FH

How to tie your pointe shoe ribbons.

This blog post was inspired by Bunhead basics a web you should check out…

Knowing how to properly tie the ribbons on your pointe shoes is one of the most important things that ballet students need to know how to do. There are a few slight variations on “tying technique” that I’ve seen over the years, but the version I’ll show here is what I have always used myself and has served me very well.

(Note: All of the pictures I’ve included are of my left foot, so to tie your right shoe on your right foot you’ll just need to reverse everything. Just remember the knots should ALWAYS be on the inner side of your ankle and never on the outside.)

  1. Put the shoe on your foot and separate the ribbons so that there is one ribbon on each side of your foot/ankle. Make sure the ribbons are not twisted. While you are tying, I recommend keeping your foot flexed so that you prevent tying the ribbons too loose or too tight.
  2. Take the inside ribbon and cross it over towards the outer side of your foot. Wrap this ribbon one full time around your leg/upper ankle and end with the leftover ribbon on the inner side of your ankle.
  3. Now take the outside ribbon and cross it over towards the inner side of your foot. Wrap this ribbon one full time around your leg/upper ankle and end with the leftover ribbon on the inner side of your ankle.
  4. Double knot the two ribbons together. As you can see from the photos, you want to have some leftover ribbon after you knot them so that it won’t be too difficult to untie them when you need to take your shoes off. About 2 inches of “extra” ribbon length should be enough. When you first sew your shoes with brand new ribbons, you will likely need to trim off some excess after you tie them for the very first time — just make sure you don’t cut off TOO much. You will also want to either paint the ends of the ribbons with clear nail polish or use a lighter to singe the ends. This will keep them from fraying/unraveling.
  5. After you make your double knot, fold up the extra ribbon sticking out and tuck it underneath the ribbons that are tied around your leg/ankle. As you fold it, it doesn’t have to be perfect, but you want to try to make it more of a flat shape than just balling it up. (*Some people tuck the extra ribbon “from the top” as opposed to “from the bottom” like I show in the pictures. Both are correct, but I just personally think they stay tucked in better when you tuck them from the bottom.)

A few additional things to point out…

  • I see a lot of my students try to tie their pointe shoe ribbons way too low on their ankles. As you can see from the photos above, you don’t tie them at the very bottom of your Achilles area.
  • It will take some trial and error to figure out how tight you need to tie your ribbons so that they aren’t hanging too loosely or cutting off the circulation in your feet. After you practice enough times, you will reach a point where you naturally know to tightly to pull on the ribbon while tying to achieve the right tightness.
  • As you wrap the second ribbon around your ankle, try to wrap it as much on top of the first one as possible. This will give it a cleaner look.